Installation guide : M1 gauge cover panel & Ring
To separate the gauge cover panel from the assembly, push in the black plastic tabs on top and the bottom of the housing using a flat blade screw driver.


Next step is to separate the clear acrylic cover from the base. The clear cover is glued to the base and must be cut away using an inexpensive acrylic cutter (available at home improvement centers). Using gentle pressure, score the acrylic cover several times until the scoring line is quite deep. Gently twist the cover from the base to separate. The resulting cut should be smooth and clean. If there are minor cracks or irregularities, do not worry since the dash pod will hide them once reinstalled.

Although the double sided tape should be strong enough to hold the AWD panel cover, the use of additional screws (included in the package) is recommended. First drill pilot holes before attaching the screws. Once the panel cover is installed, remove any OEM rings before installing AWD rings.
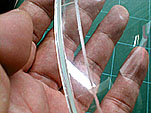
Once the installation of AWD panel cover and the AWD rings are complete, reverse the disassembly process. The clear Acrylic cover does not have to be glued back since the pressure from the dash pod cover will hold it in place once reassembled.

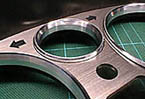
Gauge face/ Version MC(NA)
cover panel/ typeH
AWD ring/ type Vintage(new!)